ne arıyorsun?
Installing exhaust wrap correctly is not simply a matter of winding tape around a hot pipe. The finished result depends on pipe condition, wrap material, width, overlap, tension, bend geometry, fastening and the way the installation is inspected after its first heat cycles.
A useful exhaust wrap installation sequence is:
This guide explains each step for automotive headers, exhaust pipes, motorcycle systems, downpipes and other suitable exhaust components. For available materials and constructions, see the BSTFLEX Exhaust and Header Heat Wrap range.
Do not use thermal wrap to hide an exhaust problem.
Before installation, inspect the pipe for:
Any structural defect should be repaired before insulation is installed.
This matters because exhaust wrap can make the pipe surface more difficult to inspect once the installation is complete. Covering existing corrosion or a leaking weld does not correct the underlying problem.
Not every part of an exhaust system should automatically receive direct-contact insulation.
Check the exhaust-system requirements before wrapping:
A flexible exhaust joint, for example, is designed to accommodate movement. Tight spiral insulation across that joint can interfere with its mechanical function.
A catalytic converter operates within a defined thermal range. Adding direct insulation can change retained heat, so a separate shield may be more appropriate when the purpose is to protect the floor or nearby components.
Likewise, the term Titanium Exhaust Wrap describes an exhaust insulation product category. It does not mean that every titanium-metal exhaust pipe should be wrapped. Pipe material compatibility must be checked separately.
The installation method depends partly on the wrap construction.
Fiberglass is commonly used for general-purpose exhaust thermal management where the selected product's operating capability meets the application.
BSTFLEX offers Black Glass Fiber Exhaust Wrap for headers and exhaust pipes.
Some fiberglass constructions may become easier to position when lightly dampened, but this should never be treated as a universal installation rule. The exact product instructions should determine whether wet installation is appropriate.
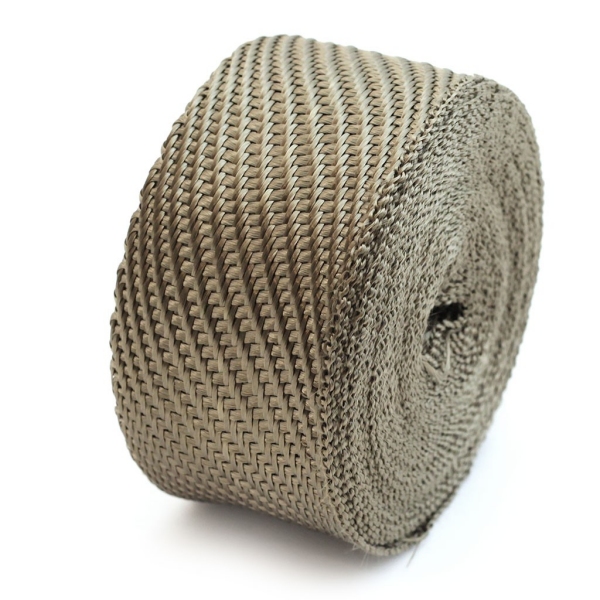
Titanium exhaust wrap is widely used for performance headers, downpipes and high-temperature exhaust systems.
BSTFLEX Black Titanium Exhaust Pipe Wrap specifically states that pre-wetting is not necessary.
This is an important example of why installers should not automatically soak every exhaust wrap before fitting it.
Silica exhaust wrap is used where a higher-temperature construction is required.
BSTFLEX High Temperature Inferno Header Exhaust Heat Wrap provides a silica option for severe thermal environments.
High temperature capability does not change the basic need for controlled overlap, secure fastening and correct clearance.
Where an exposed wrap may experience additional mechanical wear, a reinforced construction may be appropriate.
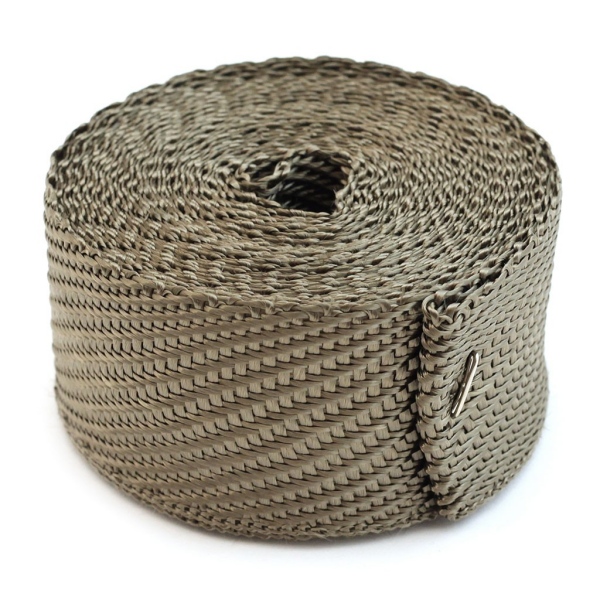
BSTFLEX Pro Black Exhaust Heat Wrap uses a high-temperature glass-fiber insulation layer with a 304 stainless steel outer structure.
The reinforced outer surface changes the way the material behaves around bends and overlaps, so its installation should follow the relevant product instructions rather than copying the method used for an ordinary textile tape.
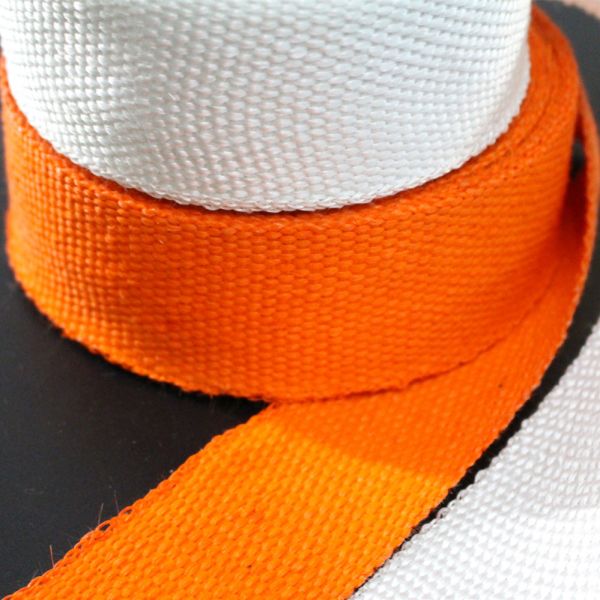
Width changes how easily the material follows a pipe.
| Wrap width | Typical installation advantage | What to check |
|---|---|---|
| 1 inch | More adaptable around small pipes and tight bends | More turns and greater installation time |
| 1.5 inch | Intermediate coverage with good control around moderate geometry | Confirm fit on the tightest bend |
| 2 inch | Faster coverage on larger or straighter pipes | Can become difficult around tight bends and collectors |
The widest tape is not automatically the best tape.
A 2-inch exhaust wrap may be efficient on a long downpipe but awkward around closely spaced header primaries. A narrower wrap can provide more controlled coverage where the pipe changes direction frequently.
Trial the most difficult section before selecting one width for the entire system.
Exhaust wrap consumption depends mainly on:
A straight-pipe calculation is useful for planning, but bends and transitions normally require additional material.
Use the BSTFLEX Exhaust Wrap Calculator and Sizing Guide to estimate the initial quantity.
For OEM production, perform a trial installation on an actual exhaust assembly before establishing a pre-cut length or kit quantity.
There is no universal answer.
The correct wet or dry installation method depends on the wrap construction.
Some woven fiberglass wraps may be easier to position when lightly dampened. Other products are specifically designed for dry installation.
Before wetting a roll, check:
Do not assume that “pre-wet exhaust wrap” is a requirement for every fiberglass product, and do not soak a Titanium, silica, coated or composite wrap unless the relevant instructions permit it.
For the BSTFLEX Black Titanium Exhaust Pipe Wrap, pre-wetting is not required.
The wrap should be installed with controlled, consistent tension.
Too little tension can allow:
Excessive tension can also create problems, particularly around bends, coated materials or reinforced constructions.
The objective is not to stretch the tape as hard as possible. The objective is a stable installation with uniform coverage.
Keep the tension repeatable from the starting point to the finishing point. For OEM installation instructions, define the method by an approved sample rather than relying only on phrases such as “wrap tightly.”
There is no single overlap percentage or dimension that should automatically be applied to every exhaust wrap.
The correct exhaust wrap overlap depends on:
More overlap increases material consumption and finished thickness.
Too little overlap can create uneven insulation or exposed gaps.
For repeat production, specify overlap as an actual dimension or percentage and show how it is measured. Do not leave the installer to determine the overlap by appearance alone.
Choose a starting position that allows the beginning of the wrap to be secured without obstructing:
Before making the first full turn, confirm that the planned direction allows the material to pass around all bends and transitions.
Secure the starting end using the specified high-temperature fixing method. Do not rely on ordinary plastic cable ties.
If the pipe will be removed frequently, reconsider whether permanent spiral wrap is the most practical insulation format.
Bends are where many exhaust wrap installations become uneven.
The outside radius of a bend travels farther than the inside radius. This creates a natural difference in the way each turn sits against the pipe.
During installation:
If the selected width cannot follow the bend cleanly, consider a narrower wrap rather than forcing the existing tape into folds.
A collector combines multiple tubes and usually changes diameter over a short distance.
Do not assume that the overlap used on each primary tube will automatically remain correct through the collector.
Before wrapping the transition, check:
On complicated header assemblies, wrapping individual primaries and the collector as separate controlled sections can be easier to reproduce than attempting one uninterrupted installation.
Exhaust wrap fasteners must tolerate the thermal and mechanical environment around the pipe.
Common high-temperature fixing methods include:
Ordinary nylon or plastic cable ties are not final exhaust wrap fasteners.
Fasteners are normally required at the starting and finishing points, and additional retention may be needed where specified by the installation design.
Position metal fasteners so that sharp tails do not contact:
Trim or secure the tail according to the fastener design.
The finishing point should remain secure after vibration and repeated thermal expansion.
Before installing the final tie or clamp:
Do not use an end-finishing tape as a substitute for structural exhaust repair or for a missing mechanical fastener unless the product specification specifically defines that method.
Wrapping a pipe increases its finished outside dimension.
After installation, inspect clearance to:
Check the actual range of movement where the engine, exhaust or nearby parts can move during operation.
A wrapped pipe that clears a hose while the vehicle is stationary may contact it under engine movement or vibration.
Follow the initial heat-up instructions supplied for the selected wrap.
During the first heat cycle, some exhaust wraps or surface treatments may produce temporary odor or light smoke as moisture, processing residues or finishes respond to heat.
This should not be interpreted as permission to ignore any amount of smoke.
Stop the engine and investigate if you observe:
The first heat cycle should be performed in a well-ventilated location and away from combustible materials.
Once the exhaust has fully cooled, inspect the wrap again.
Possible causes include:
A brief initial odor or light smoke and continued heavy smoke are not the same condition.
If smoke continues or increases, shut down the system and identify the source before further operation.
Road vehicles, motorcycles, marine equipment and off-road machines may expose exhaust insulation to water.
Wet-service suitability depends on:
Do not treat an ordinary woven exhaust wrap as waterproofing or corrosion protection.
Where moisture exposure is frequent, inspect the pipe and insulation as part of the maintenance plan.
Exhaust wrap does not automatically cause corrosion, but the installation can change the environment around the pipe.
Corrosion risk depends on factors including:
Never install wrap over serious rust simply to hide it.
Inspect and repair the exhaust first. Where corrosion is a known concern, confirm the pipe manufacturer's requirements before selecting direct-contact insulation.
Do not assume that every coating is compatible with the higher retained temperature created by insulation.
Before wrapping a coated header or exhaust pipe, confirm:
The wrap rating does not establish the temperature capability of the coating underneath it.
A flex section is designed to move.
Tightly wrapping across it may:
If thermal protection is required around a flex section, consider a separate shield, sleeve or engineered flexible insulation arrangement that preserves the joint's intended movement.
A catalytic converter is not simply another straight pipe.
Direct insulation can increase retained heat around the converter.
Where the objective is protecting the floor, tunnel or nearby components, a spaced heat shield may be a better approach.
Follow the vehicle or exhaust-system requirements before adding direct-contact insulation to any catalytic converter or aftertreatment component.
Do not assume so.
Some textile wraps become less flexible after repeated heat cycling. Removing the material can disturb the weave, damage coatings or change its ability to fit the pipe correctly.
If the component requires regular removal, choose the insulation method with maintenance access in mind before installation.
A removable blanket, jacket or shield may be more practical for a frequently serviced component.
After the first heat cycle and periodically during service, inspect:
| Inspection point | What to look for |
|---|---|
| Overlap | Gaps, displacement or bunching |
| Starting and finishing points | Loose ends or movement |
| Fasteners | Loose ties, broken clamps or sharp exposed tails |
| Bends | Gaps on the outside radius or folds on the inside radius |
| Nearby components | New contact, overheating or reduced clearance |
| Wrap surface | Abrasion, contamination or mechanical damage |
| Pipe condition | Any accessible signs of corrosion, cracking or leakage |
Correct the cause of damage rather than simply adding another layer over the affected area.
For repeat production, convert the approved installation into a controlled specification.
An OEM exhaust wrap instruction can define:
Photographs of an approved sample can be useful for showing bend coverage and fastening positions.
For custom rolls, pre-cut lengths, locking ties, private-label kits and packaging requirements, see Exhaust Wrap Manufacturer for OEM and Private Label Supply.
Inspect and clean the exhaust, select the correct material and width, measure the required quantity, follow the specified wet or dry method, maintain consistent overlap and tension, secure the ends with suitable high-temperature fasteners, then inspect the installation after the first heat cycle.
There is no universal overlap for every wrap. Use the product installation specification and account for wrap width, pipe diameter, bends and required coverage.
Only when the selected product instructions permit or recommend it. Some fiberglass constructions may be easier to handle when dampened, while other products are intended for dry installation. BSTFLEX Black Titanium Exhaust Pipe Wrap does not require pre-wetting.
Suitable stainless steel locking ties, stainless wire, metal clamps or another approved high-temperature fastening method may be used depending on the product and installation.
Some installations may produce temporary odor or light smoke during initial heating. Persistent heavy smoke, flames or signs of fluid contamination should be investigated immediately.
Do not use wrap to hide serious corrosion. Inspect and repair the exhaust before installing thermal insulation.
Do not automatically wrap a catalytic converter. Direct insulation changes heat retention. Follow the exhaust-system requirements and consider a separate shield when the objective is protecting surrounding components.
A flex joint must retain its movement. Ordinary tight spiral wrapping may not be appropriate. Use an insulation method that preserves the joint's mechanical function.
Do not assume the material can be removed and reused. Some wrap constructions become less flexible after repeated heat exposure. Follow the relevant product instructions.
Quantity depends on pipe outside diameter, pipe length, wrap width, overlap and bends. Use the BSTFLEX Exhaust Wrap Calculator and verify the final consumption on the actual assembly for production work.
Installation quality cannot compensate for the wrong material or the wrong width. Compare fiberglass exhaust wrap, Titanium exhaust wrap, silica exhaust wrap and reinforced exhaust wrap according to the real exhaust temperature and environment.
For the complete product range, visit BSTFLEX Exhaust and Header Heat Wrap.

No.10, Chuangxin North Road, Nanshan Park, Ningguo Economic and Technological Development Zone, Ningguo City, Anhui Province, China
tel/Whatsapp : 0086-15856303740
e-posta : sales@bstbraidedsleeve.com
Skype : vanesa-cheng